How to make text watermark brush in Photoshop 7.0 ?

Making watermark text is really easy and fun using Photoshop 7.0 & useful for copyright purposes. You can protect your images from being copied however this watermark can only be used in image files. The most commonly used files are JPG and PNG.
Step wise step guide to create Watermark Brush in Photoshop 7.0
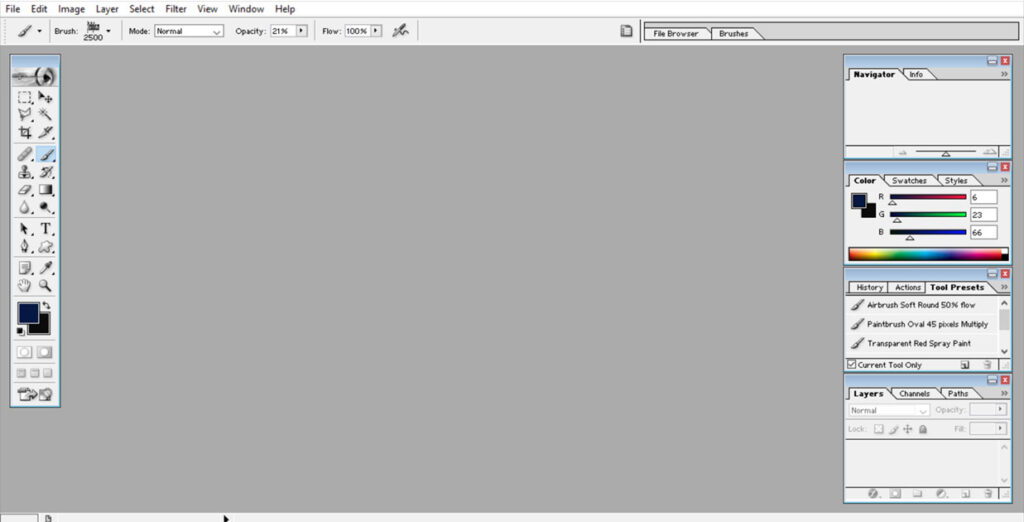
- Open Photoshop 7.0 or whichever version of photoshop you are using.
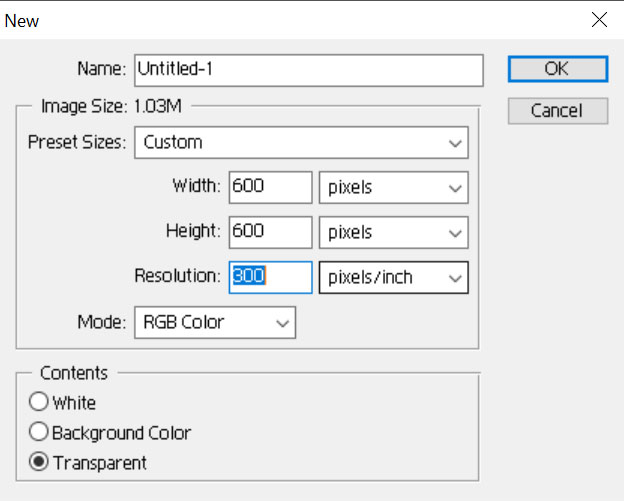
2. Click on File then New (Ctrl + N) and set the image size to a minimum of 600 x 600 Pixels with 300 pixels/inch Resolution. The content background should be Transparent.
3. Type the text you want to use as a watermark and make sure the text color is black with transparent background.
4. For choosing the copyright icon, click on custom shapes, choose the copyright © icon and draw the shape before the text.
5. Make the text alignment centered . Bold text looks better so use Arial or Impact font as a font of choice.

6. Click on Layers-Rasterize-Layer
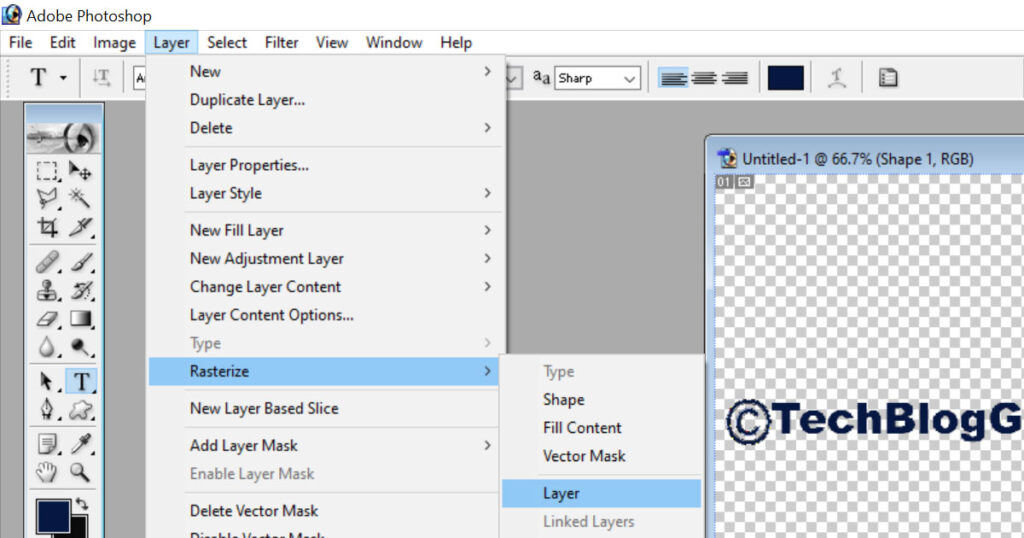

7. Select the text along with the © copyright icon with the help of Selection tools.
8. Go to Edit menu and click on Define Brush
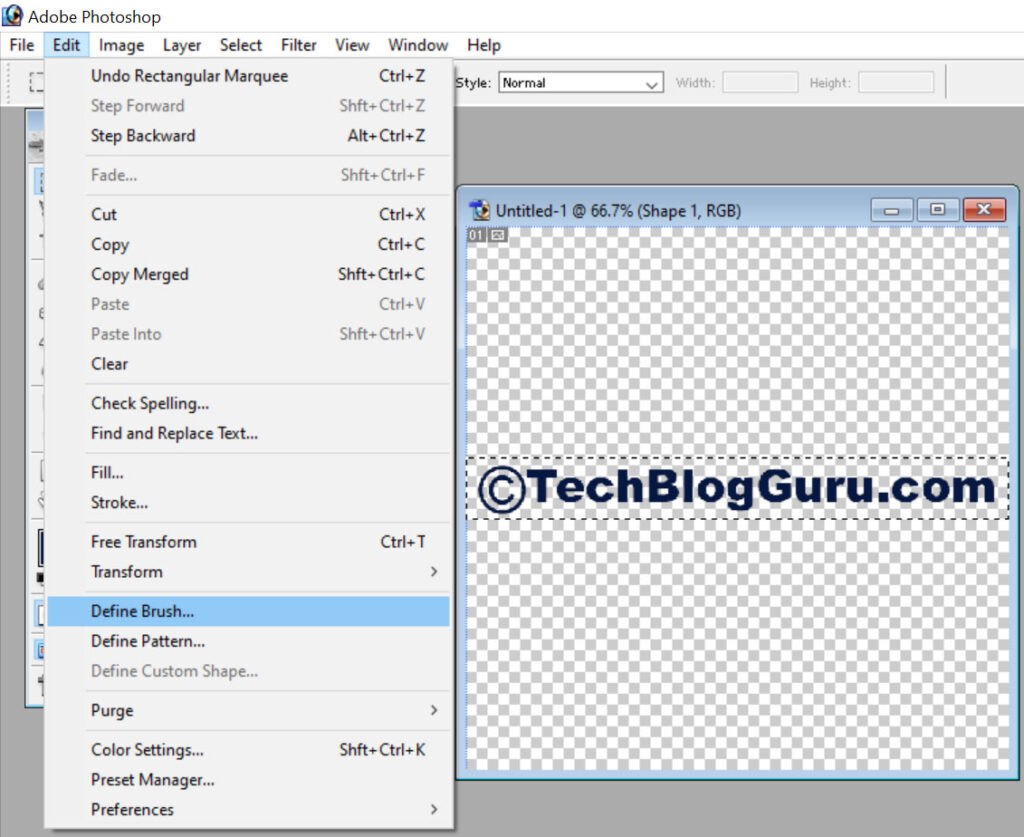
9. Define brush and rename the brush as per your choice.

10. Now Click on the Brush Tool(B)
11. Choose the Brush you defined which can in the last drop down list of Brushes .
12. Choose the diameter of the brush you need.
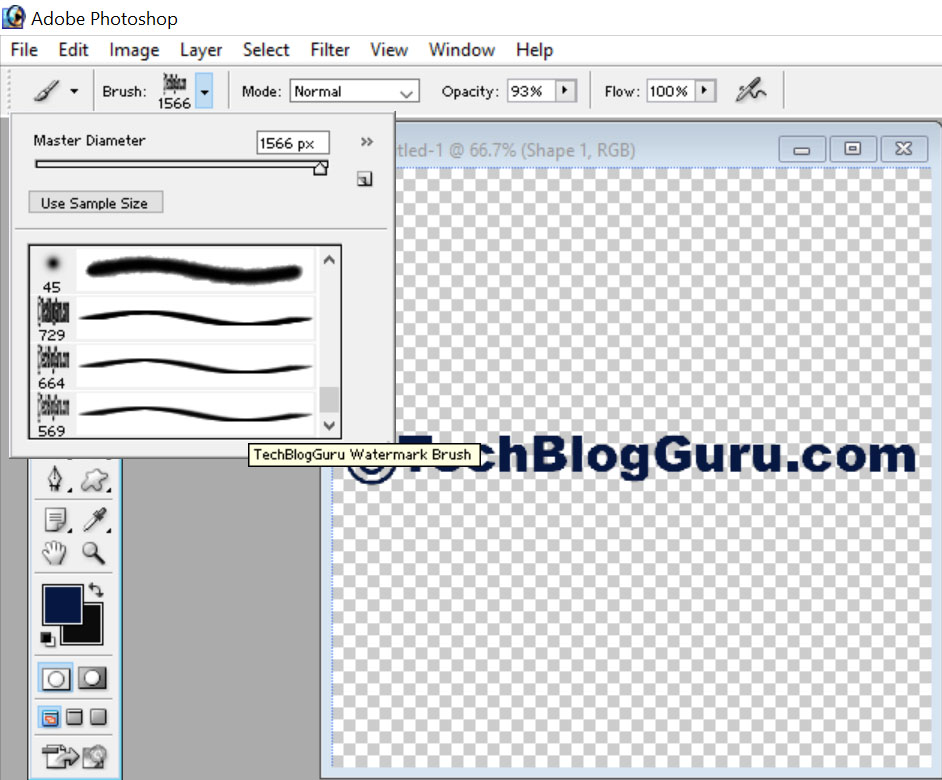
13. Open an image you want to put the watermark
14. Choose the brush tool as per above mentioned procedure and click on the image where ever you want to put the watermark .
15. Decrease the opacity of brush according to image color and need .

16. In this way you can put copyright text in any image using Photoshop 7.0 or any other version of photoshop and protect your image from misuse and being copied.


