How to draw a custom shape and circles in Adobe photoshop?

Table of Contents
Introduction
Adobe Photoshop custom shapes are really an essential tool for editing and making ID cards, banners, text effects, and many more things related to editing and content creating using photoshop.

Steps to make custom shapes
Step 1: Open Adobe Photoshop whichever version you are using. However, I will be using Photoshop 7.0 to demonstrate the steps and procedure.
Step 2: Click on the Custom Shape tools which are present in the right of the Pen tool.
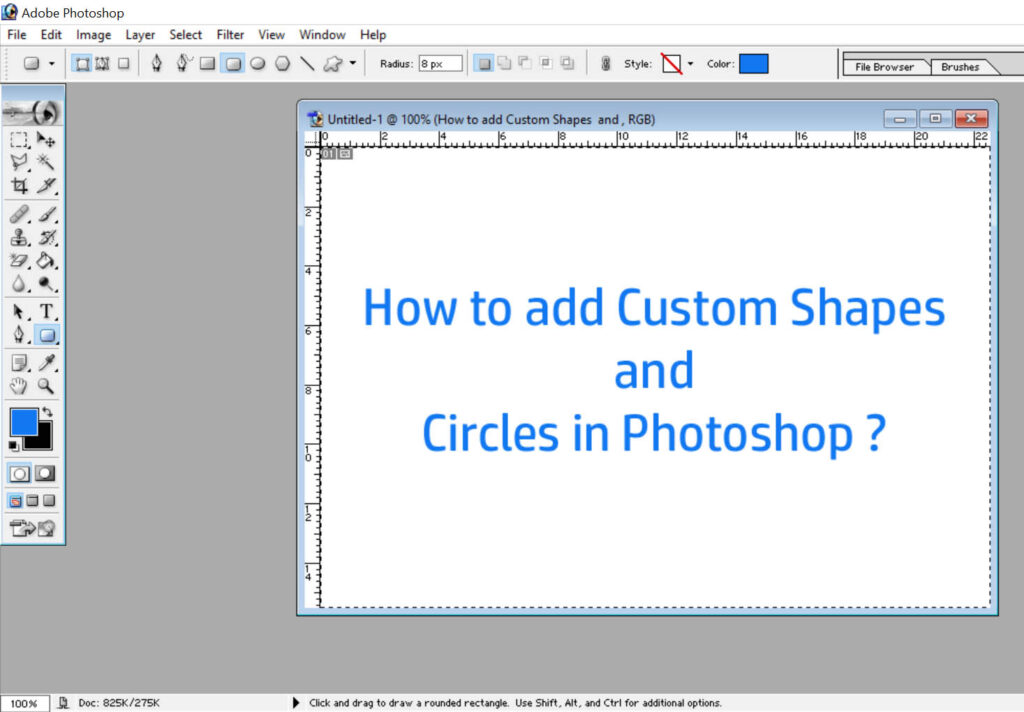
Step 3: Select any shape from the tool, I am selecting the Rounded rectangle tool for demonstration purposes.
Step 4: Draw a Rounded rectangle of any size you want but make sure foreground color and background colors are different.
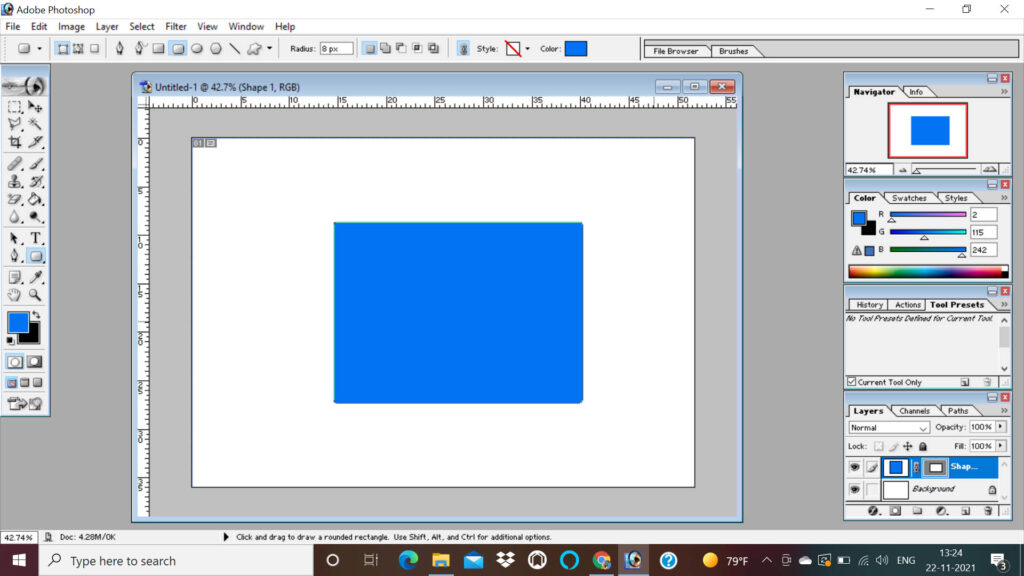
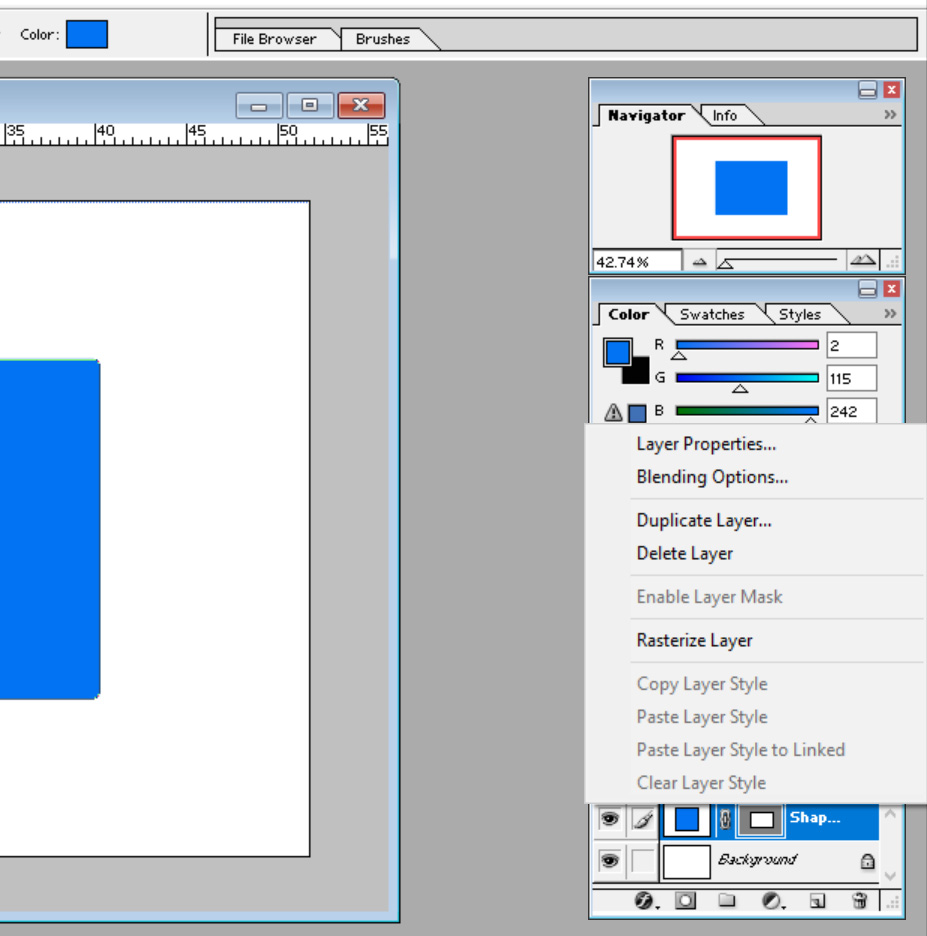
Step 5: Right-click on the shape in layers as shown in the image below and click on the Rasterize Layer.
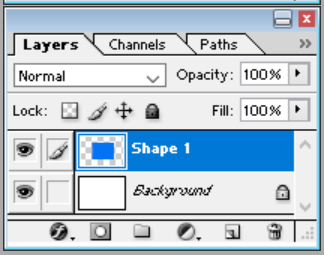
Step 6: After applying Rasterize layer the layer will be seen as shown in the image.
Step 7: Go to Edit Menu and click on the Stroke option.
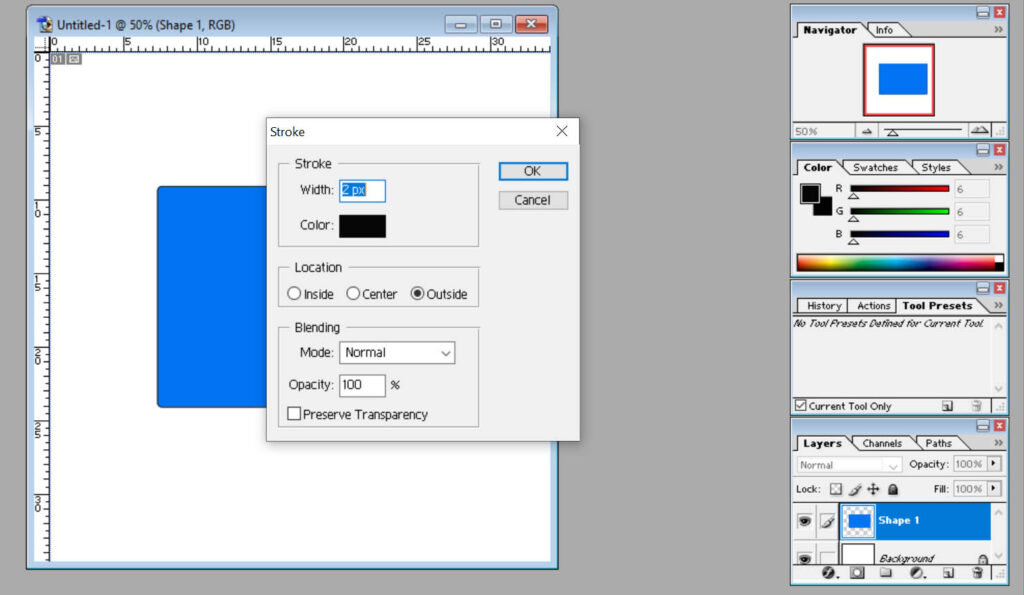
Step 8: In the stroke option you can choose the stroke width as per the thickness needed in a rectangle for your project 1 px or 2px.
Step 9: Choose the color which you want to keep as a stroke color and the location outside if you just want to create the borderline rounded circle with a certain width.
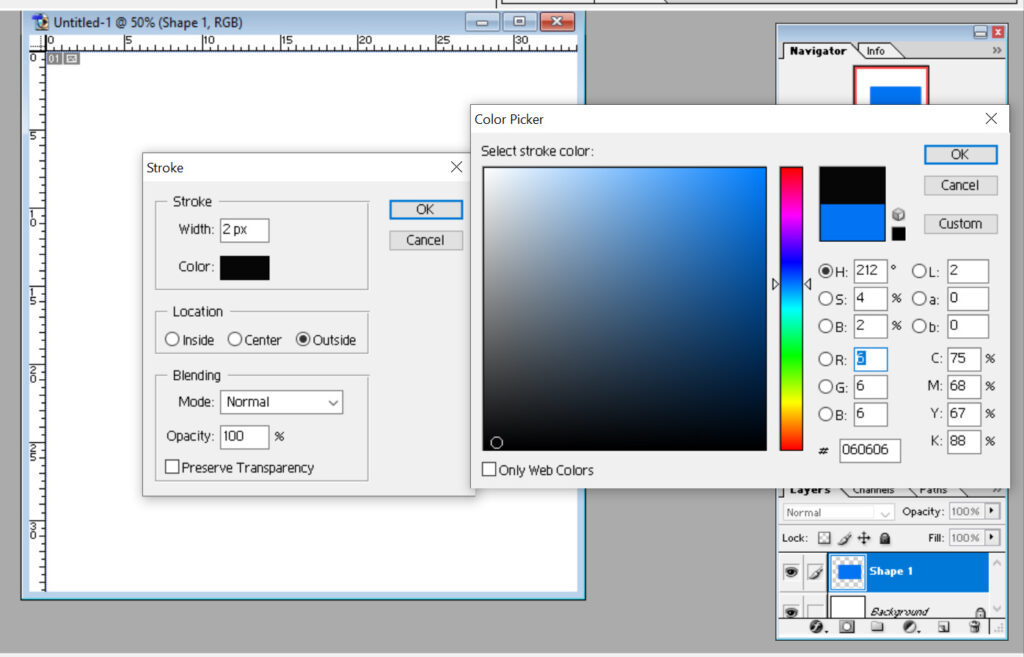
Step 10: Blending mode should be normal and the opacity 100%.
Step 11: Press Ok.
Step 12: Select Magic eraser tools .
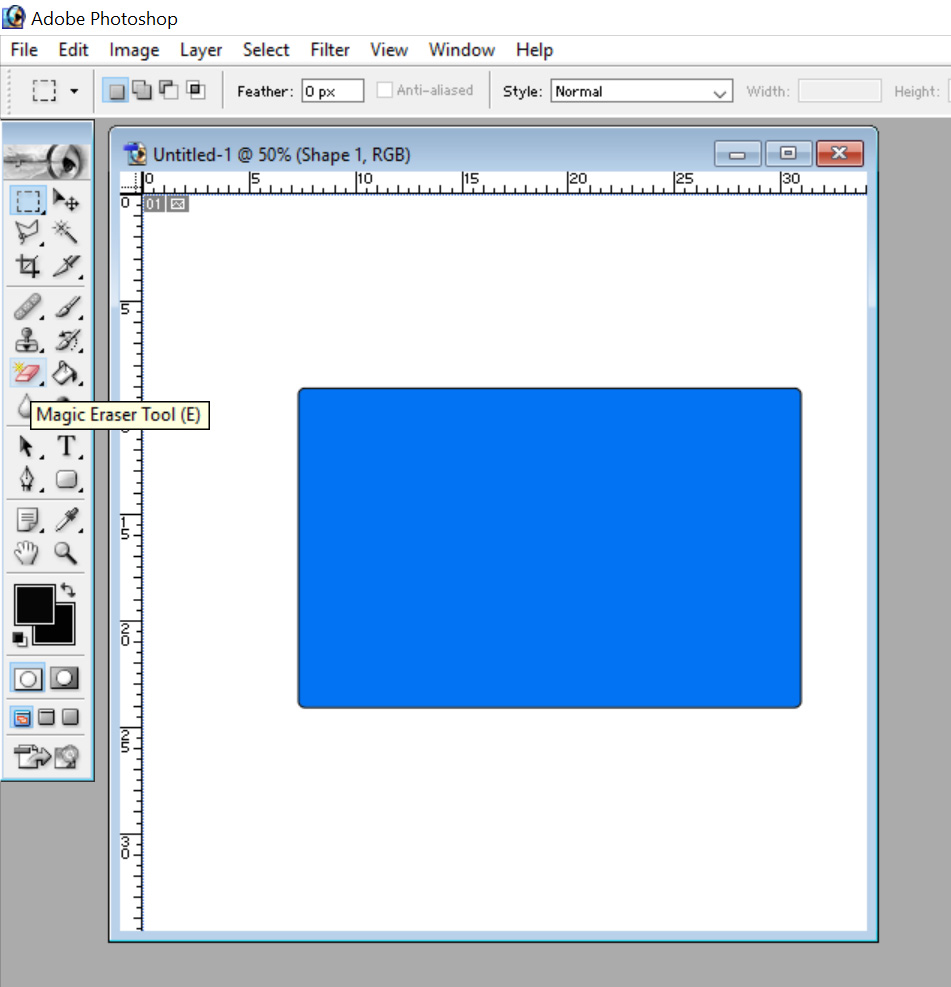
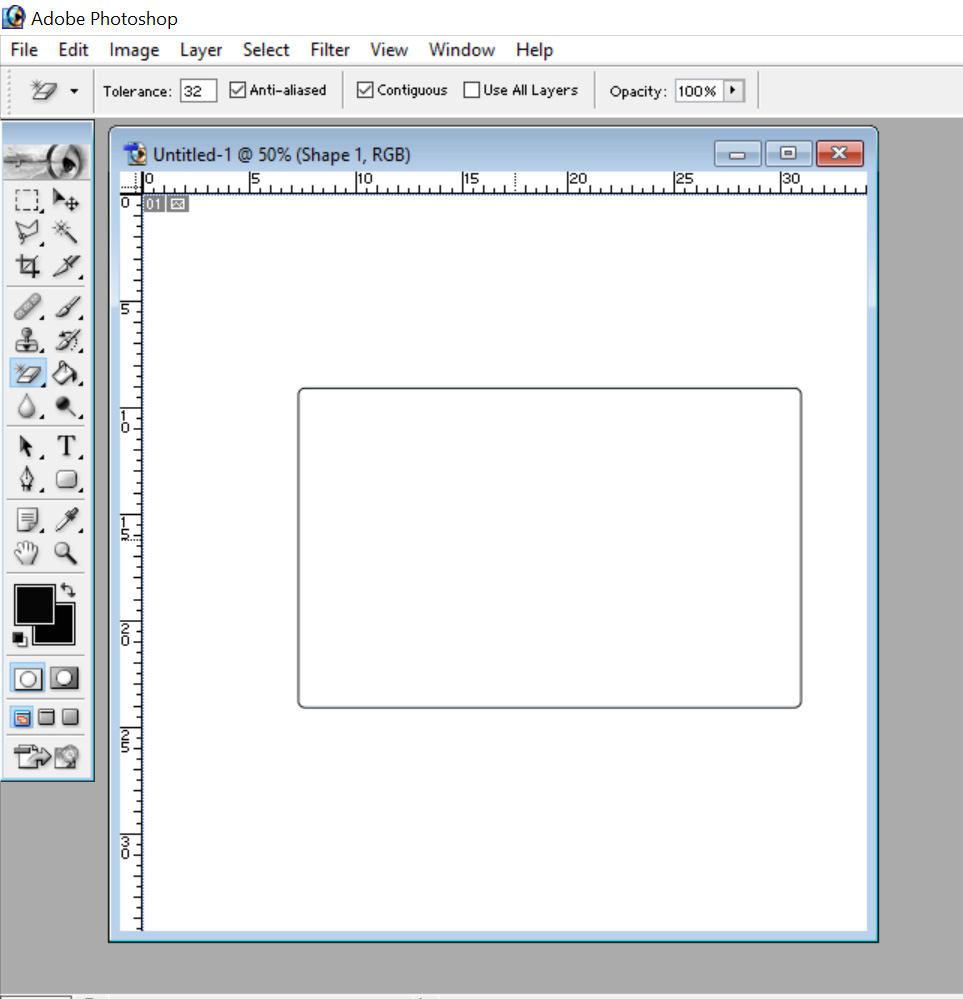
Step 13: Click in the center of the blue rounded rectangular shape after selecting magic eraser tools. The result will be as shown in the image below.
Conclusion
In this way, you can easily create a rounded rectangle or any shape from custom shapes using any version of Adobe photoshop.


